I love when party favors are fun and fit the theme of the birthday party- but I especially love it when they are something that the party guest wants to keep around for a long time! Framed pictures of friends are always a huge hit as a party favor at our kids birthday parties! But how about if we jazz it up and make these photos fit our Minecraft Birthday Party theme? Here's how to create the BEST EVER DIY Minecraft Party Favors!
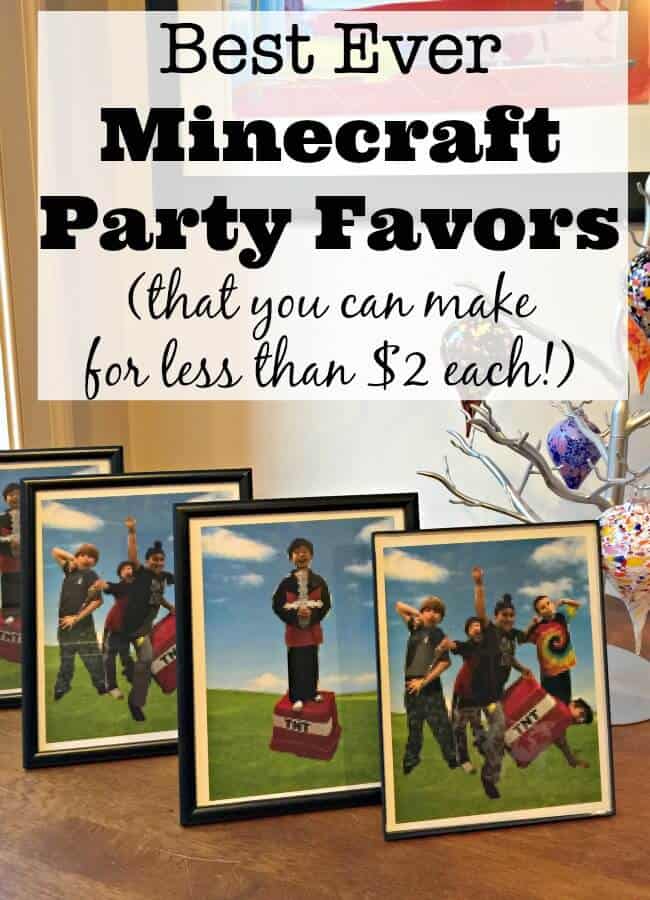
These are so simple to create (although I do recommend that you practice the steps a few times before the party) and cost less than $2 each!
You'll need a computer to do the image editing as well as a color printer at home to print the finished image.
It all starts with taking some photos of the party guests, and then turning them into a Minecraft-inspired image!
Here's how it's done:
Step 1: Prepare a few photo props
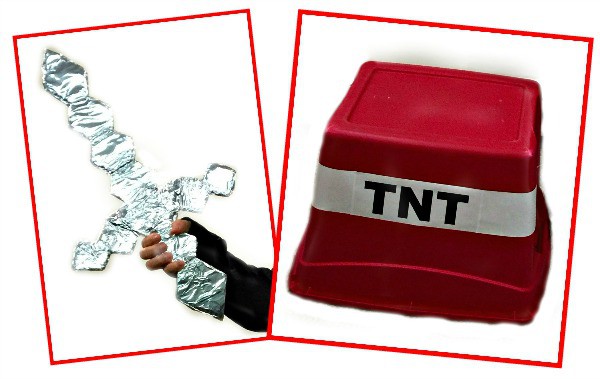
We used a piece of cardboard from a shipping box and some aluminum foil to create a sword, and simply turned a large plastic red tub upside down (so the kids could stand on it), and added a paper banner that read “TNT”. (You could also just paint a box red to create the TNT prop).
Don't worry about getting too fancy with these props, because we'll be pixelating the images, any detail will be lost! (And don't spend any money on them either- just use whatever you have around the house!)
Step 2: Order your frames
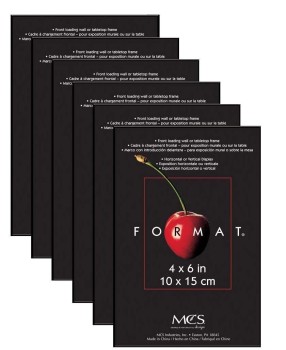
The week before the party- order enough picture frames for each party guest. I really like these MCS frames This is an affiliate link: MomOf6 earns a commission if you purchase, at no additional cost to you. that I found on Amazon. They come in a pack of six 4×6 frames. Or you can go a bit larger and order 5×7 or 8×10 frames.
Step 2: During the party, have a photoshoot!

Kids love to take pictures- especially silly pictures with their friends so it won't be hard to get them to cooperate!
If possible, have them stand in front of a light-colored (or at least solid-colored) wall and have fun with it! Let them be as silly as crazy as they want to be. And if eyes are closed or the picture is a bit blurry from movement- no problem!
Step 3: Edit the images
Our Minecraft party happened to be a sleepover party- so after we were done with party games and with playing Minecraft, the kids settled down to watch a movie. This gave me the perfect opportunity to edit the images from our photoshoot on our computer!
This will take a bit of time, so if you are not having a sleepover party, you may want to send home the frames with the kids as the favor- with this message that lets them know you'll be emailing the Minecraft pics to their parents a bit later!
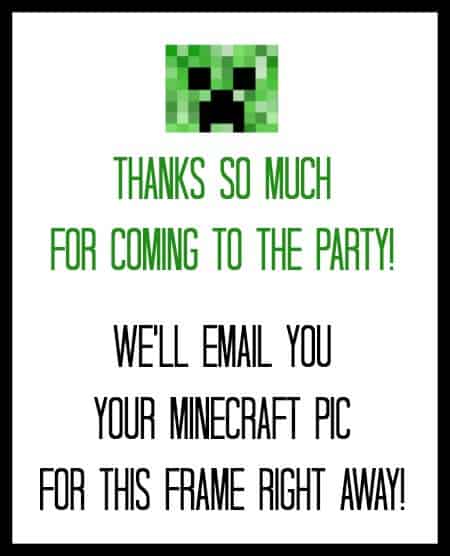
So let's get started with the editing steps!
The first thing you need to do is to take a look at all of the pictures you took during your photo shoot and decide which ones you want to use. Save them in an easy-to-access place on your computer (I prefer to save everything right to my desktop while I am working on a project).
Also, please click here to open our Minecraft background image, and save this file to your desktop as well (just select File, Save Page As in your browser window to save it to your desktop). We'll need it in a few minutes.
We'll be editing our images in PicMonkey This is an affiliate link: MomOf6 earns a commission if you purchase, at no additional cost to you. , so open that in a new window on your computer.
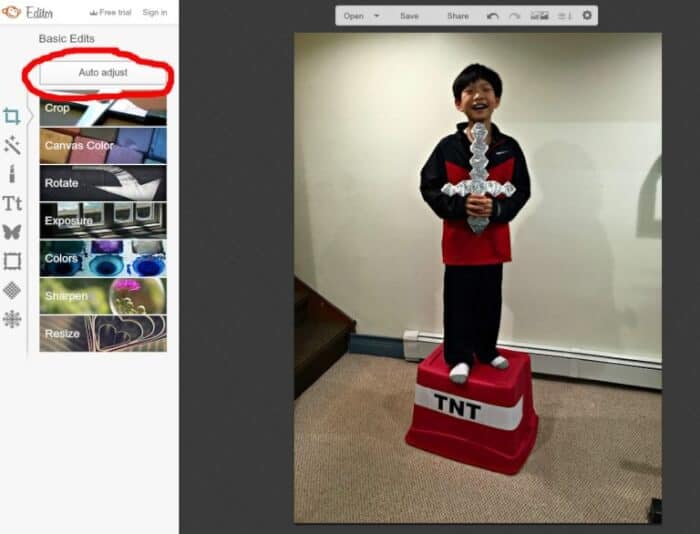
At the top of the PicMonkey screen, select Edit, and then Computer (which is where you have stored your images). Navigate to your first image and select Open. Let's start by adjusting the color in our picture- by selecting Auto Adjust right there on the top of the left side of your screen (Under Basic Edits).
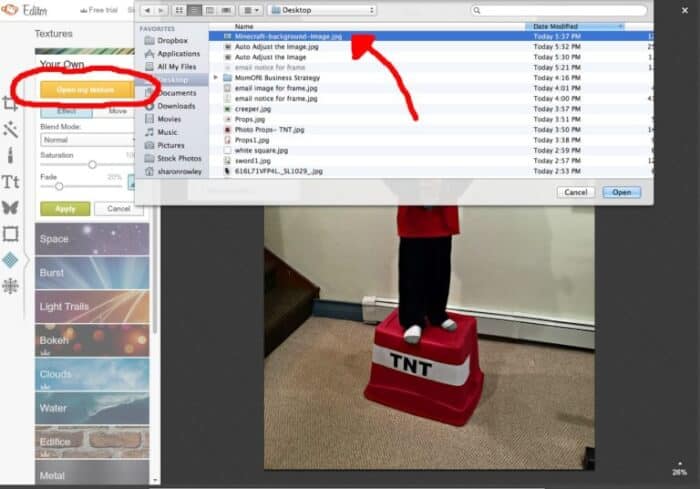
On the far left side of your screen, select the 2nd icon from the bottom (looks like a piece of woven cloth) to select the Textures menu. Then select Your Own at the top of the left side, then click Open My Texture and navigate to our saved Minecraft Background Image you downloaded and saved just a few moments ago.
Whoa! What did we just do to our picture? We added a cool overlay to it which will become our new Minecraft background for this image. But we need to do a few things in order to allow our party guest's image to “show through” this overlay. So let's look at the tools we can use:
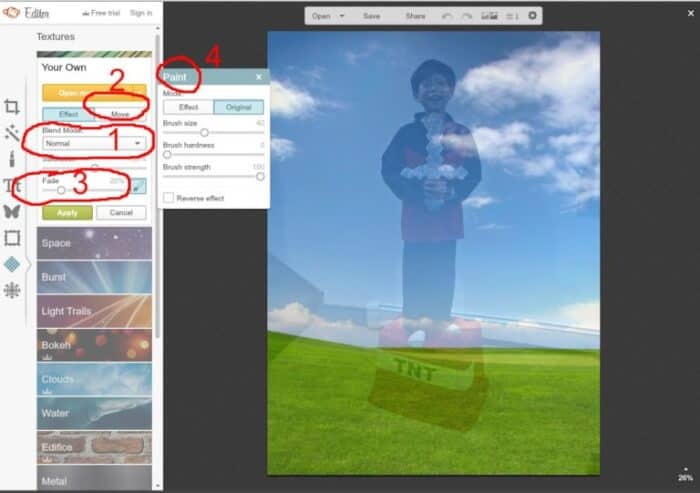
The first thing we want to do is to change the Blend Mode to Normal using the drop-down box. This will actually make the overlay appear to cover most of our image. That's okay.
Next, we may want to move the overlay up or down or even side to side on top of the image a bit. In my case, the grass line is a little lower than I would like- so I clicked on the Move button, and then used my cursor to adjust the positioning of the overlay. When I was done, I clicked on the Effect button to return to the image.
Leave the Fade slider bar set to the default of 20% for now. We will adjust it later.
Next we will work with the Paint dialog box. At the top you have two buttons- one for Original (which is selected by default) and one for Effect. We are going to start erasing the overlay now to allow our original image to show through. When you want to erase the overlay, leave the Original button selected. When you move your cursor over the image, you'll see the size of the cursor is determined by the Brush Size slider bar, and the precision of the cursor is determined by the Brush Hardness slider bar.
To get started, I suggest setting your Brush Size to around 35 and your Brush Hardness to 100. And then you are going to start using your cursor to “erase the overlay” by outlining the person and their props in your original image.
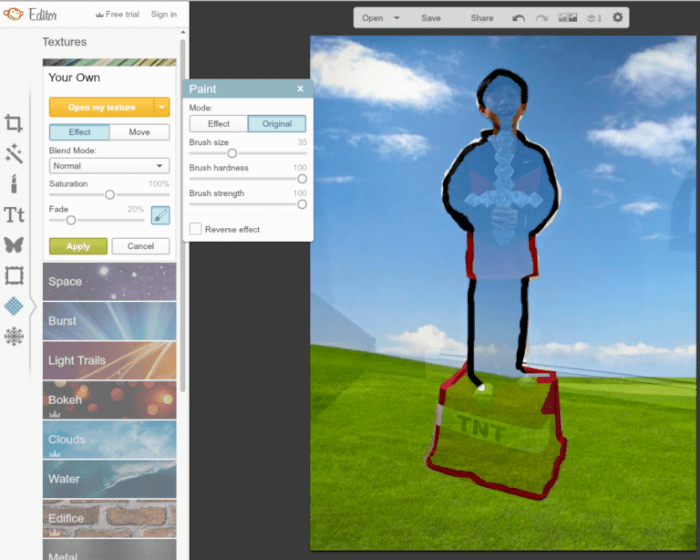
Once the image is outlined, we will change our Brush Size to make it bigger (perhaps around 55) and erase the rest of the overlay from the original image.
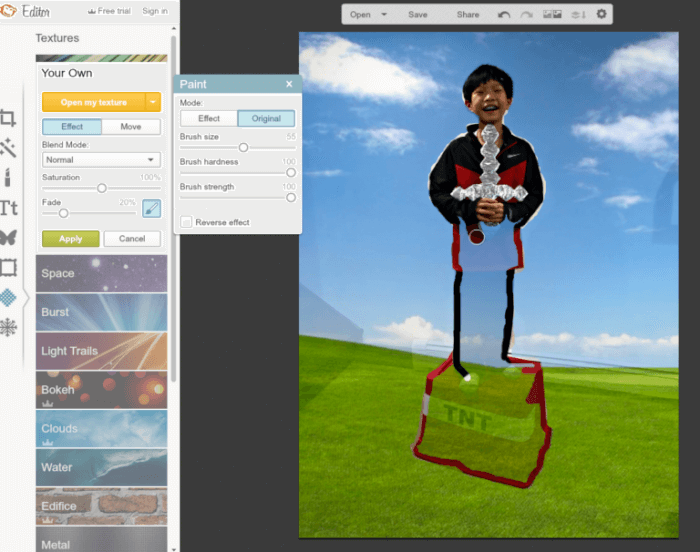
A couple of notes: because we are going to Pixelate our image, don't worry about making it perfectly precise- because it won't matter! However, if you feel you've made a mistake- remember that there is an Undo button at the top of the page.
And if you want to “erase” some of the original image and add back in some of the sky/grass overlay, simply change the button on the Paint box to Effect and use your cursor to erase!
The next step is to go back to the Fade slider bar in the Your Own box on the left side of the screen, and slide it down to 0%. Click Apply.
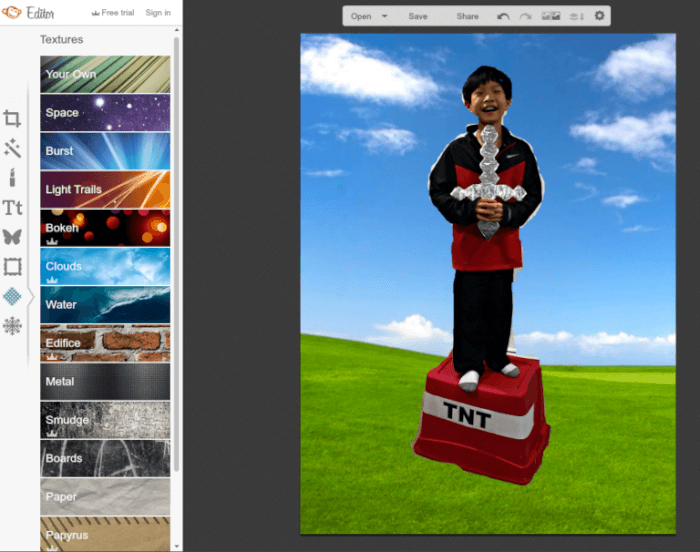
Ta da! Now your image is on a Minecraft background! If you look at mine above, you'll see that my outline around my image isn't perfect- and some of the white wall shows through. Don't worry too much about it….
Our last step is to pixelate the image! Select the 2nd icon on the left side of the screen- the one that looks like a Magic Wand. This opens the Effects menu. Scroll down to the button for Focal Pixelate and select it.
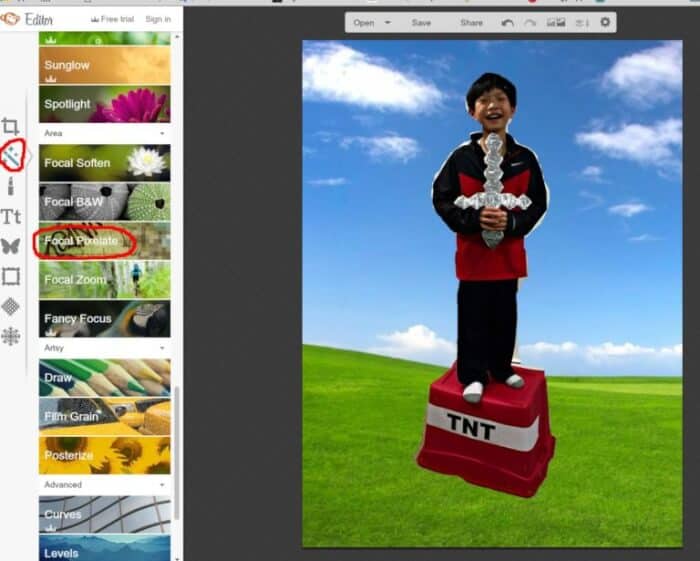
You'll want to play around a bit with the Pixel Size slider bar- perhaps setting it somewhere between 20 and 30. Set the Focal Size slider bar to zero because we want to pixelate the entire image. When you are happy with your Minecraft effect- select Apply!
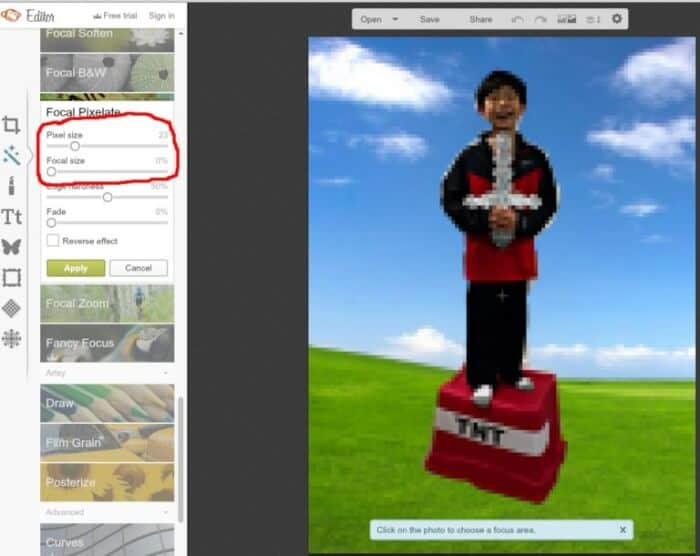
Now just click on the Save button above your image, and save it to your desktop. Print it on your color printer and place it in your frame!
It took me about 20 minutes to “erase the overlay” on this group shot, and pixelate it:
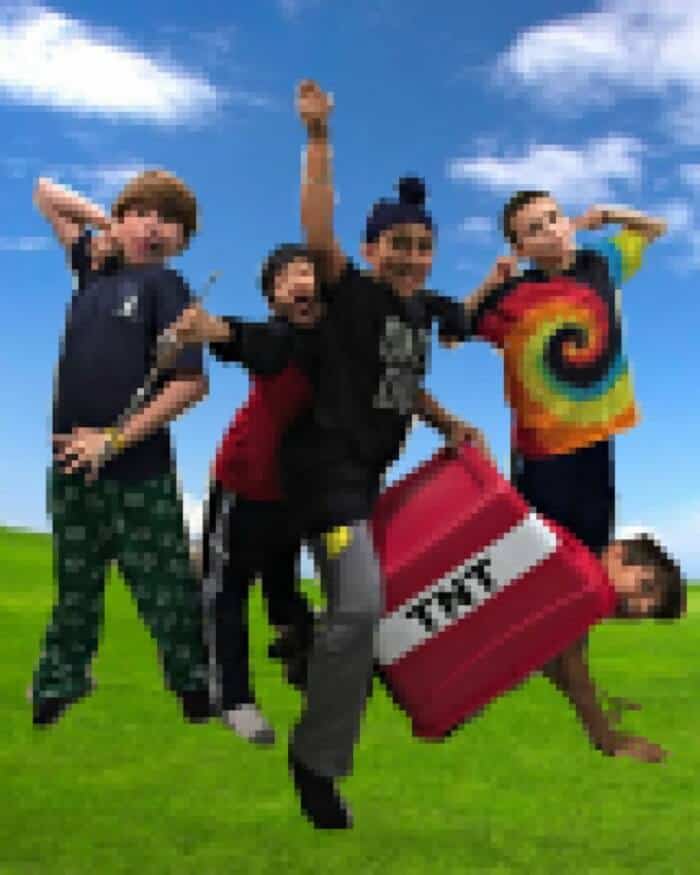
That's all there is to it! For less than $2 you created awesome DIY Minecraft Party Favors that your guests will LOVE! How cool is that?
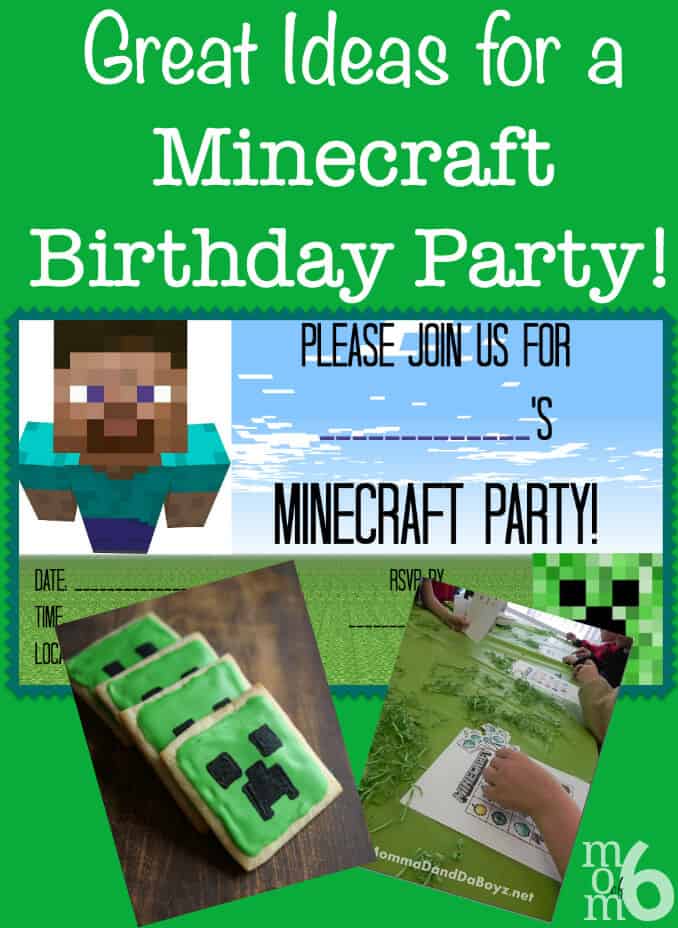
And if you are looking for more great ideas for a Minecraft Party- check out this post too!
Check out some more awesome Tween Birthday Party Ideas:
- Minute to Win It Birthday Party
- “American Ninja Warrior” Party
- Art Birthday Party
- Cupcake Wars Birthday Party
- Star Wars Party Ideas for Tweens!
Check out all of our Kids Birthday Parties here:

How to Throw Your Own Kids Birthday Parties at Home!
Looking for Some Great Party Games, Crafts, & Activities for Kids?
- 100 Truth or Dare Questions for Tweens (free printable party game!)
- 50 Would You Rather Questions for Tweens (free printable party game!)
- 10 Great Birthday Party Games for Tweens (tons of ideas from around the web!)
- 10 Awesome Birthday Party Crafts for Tweens (tutorials and supplies you'll need!)
- 10 Fun Birthday Party Activities for Tweens (fun things to do at your party!)
- or Shop for These Awesome Party Games!


Gretchen says
Valuable information. Fortunate me I discovered your website by chance, and I am shocked why this twist of fate did not took place in advance!
I bookmarked it.