We have a cool but quirky home office at our house- it is actually a long row of desks that takes up one wall in our dining room/sunroom. I love working in here because the row of windows behind me makes the room light-filled, and there is also a window right next to my desk where a mama robin hatched her three babies last spring! But the drawback to having your home office be part of the dining room is that when the office space is cluttered and messy it detracts from the setting during a nice family dinner!
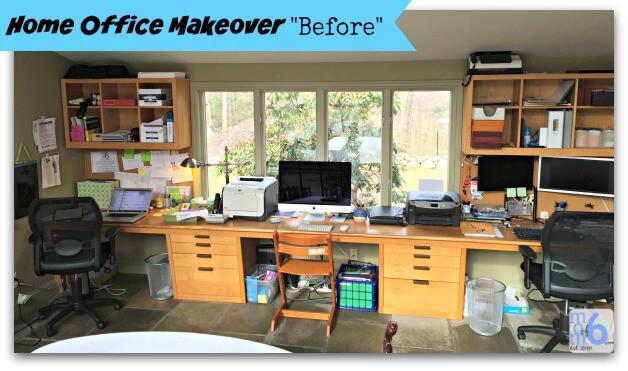
Our home office was in need of some organization and decluttering. Especially the cubbies above the desks. They are what is most visible when you are sitting at the dining room table, and while they are a nice storage solution for office supplies- stuffing them full of old toner cartridges (that I need to return to Staples), kids art supplies, and reams of printer paper were creating an eyesore.
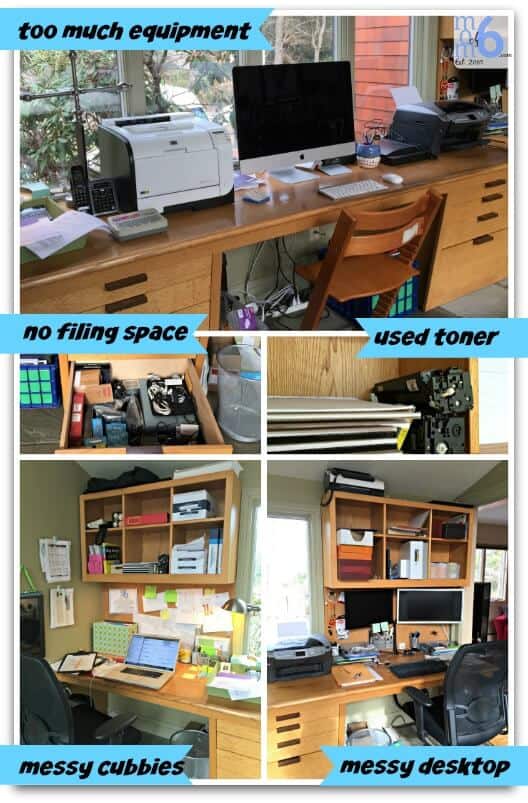
The desktops were overcrowded- with too much office equipment, wire inboxes that were holding files (because the desk drawers themselves don't hold hanging files), and too much stuff that really didn't need to be out on the desks. We were definitely overdue for a home office makeover!
I started by setting a few goals for my home office makeover:
- The overhead cubbies had to be neat, and decorative (even if this made them less functional).
- We needed to find a new home for the scanner and fax machine (they are used so rarely that I would rather just dig them out when I do need them vs. dedicating desktop space to them).
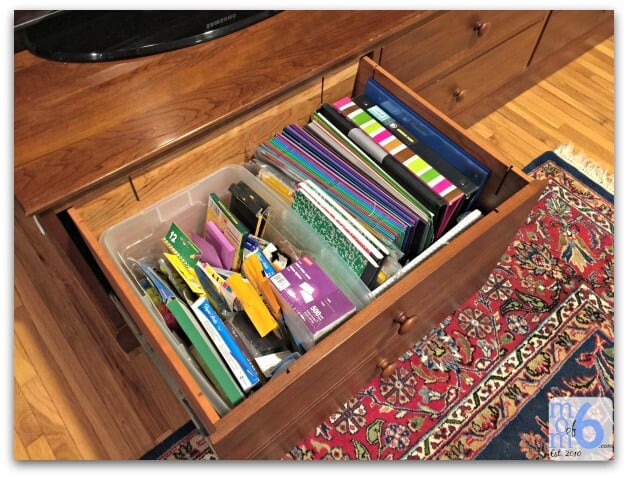
- Both Steve and I needed a small filing box for current projects, and the kids needed a place to store notebooks and scrap paper for homework at the computer. As long as they filing boxes looked good, I would prefer to have them on our desktops so they are easily accessible.
- Anything that isn't used daily needs to be stored in a drawer. I want to keep the desktops as clutter-free as possible.
- The cork boards behind our desks are great for holding brainstormed lists, notes on upcoming deadlines, goal sheets, etc. But I don't want them cluttered with other nonsense (so Halloween decorations made at school need to go!)
- The floor under the desk would be for waste cans and paper recycling only. (Which meant I needed to find another place to store the two boxes of school supplies!)
Making the Changes:
The first thing I did was to “re-home” all of the items that didn't really belong in our home office. Art supplies for the kids made their way down into our craft and game closet in the basement. I cleaned out a nearly-empty drawer in our TV room media cabinet and designated it for school supplies. (Once kids get to middle school, most school supplies such as index cards, folders, composition books, etc- aren't sent in at the beginning of the year. Kids just bring them into school as they are needed. Which means I am storing a lot of supplies here at home!)
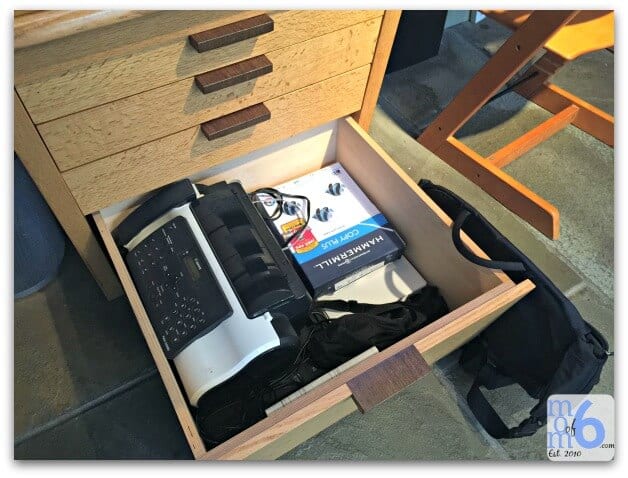
That opened up a deep drawer near my desk where I could store the scanner, fax machine, as well as my laptop sleeve and bag that I take with me when I am working outside of my home office.
Next I added a filing box to Steve's side of the desk, and went to work using my P-Touch to label folders and set up his desktop filing system. That allowed me to eliminate the messy stack of inbox bins.
I also spent some time decluttering the drawers, making sure that we weren't holding on to items we no longer used or needed. (All of this makes it so much easier to find what we need!)

Under the kids desk, I took the base of a paper shredder that we weren't using, and used it to corral all of the power strips and cords that were sitting exposed under the desk. This means that no one will accidentally kick the “off” button on the power strip which also turns off the WiFi in the house (and causes teenagers to bellow from their bedroom upstairs!). I also neatened the cords for all of the router and WiFi equipment that sits behind the computer. (You can see all of those messy cords through the window when you're outside!)
“Prettying Up” the Space:
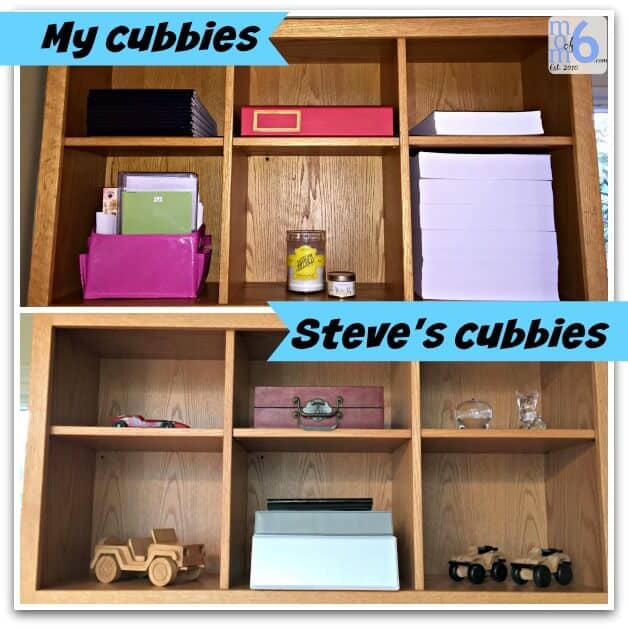
Now it was time to go to work on those cubbies. I decided that if I removed the packaging from my copy paper, a nicely stacked pile of white paper wouldn't look so awful. And if I turned around my stack of lined notepads so that their black top spine faced out- that didn't look so bad either. I neatened my pink box of stationery, and added a few candles to the bottom cubby.
On Steve's side, I had to leave his set of oversized binders in one of the cubbies because they are too large to fit anywhere else! But the rest of his cubbies I set up to be decorative, holding a chess set that we bought on a trip to China, and some awesome carved vehicles that his Dad made for the boys a few years back.
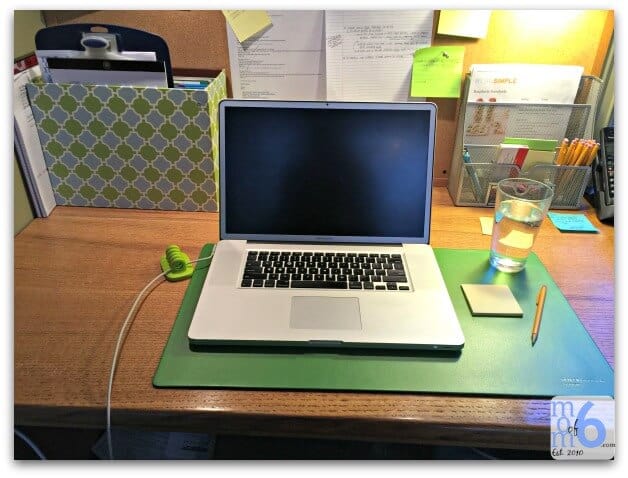
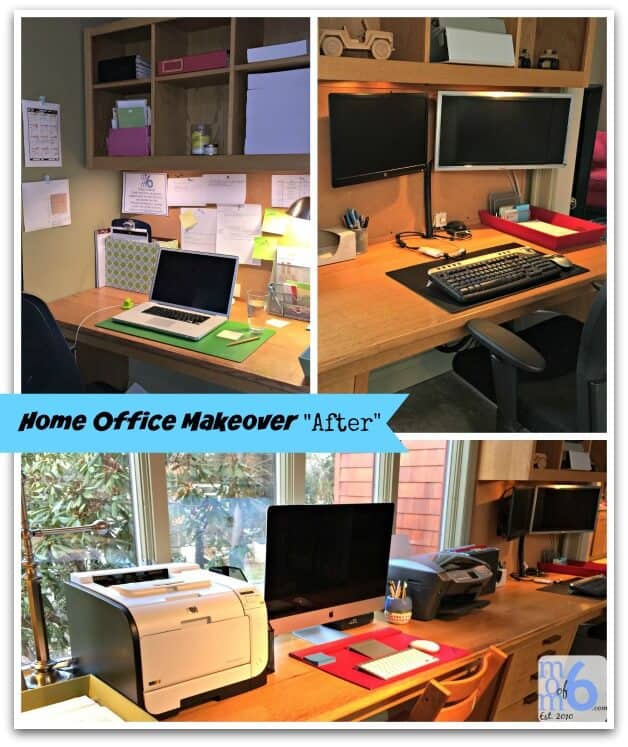
To the desktops, I added these gorgeous Satechi Desk Mats. I love my green one that matches my filing box, and for Steve's side I purchased a black one. Each of us have a fabric bin that serves as our inbox, and holds any temporary papers that we are currently using. I expect that we will clean out these inboxes regularly.
In front of the kids computer, I added a filing bin to hold whatever papers they are currently leaving behind. And repurposed a red leather desk blotter to neaten their space.
I am so pleased with how our home office makeover turned out! It is so much more pleasant to work in a neat, decluttered, and organized space! Of course…. now I feel that the dining room needs a bit of a makeover too. So tomorrow- I'll be turning to you for help! Be sure to check back tomorrow!

Mrs. Rocky says
Hello, Great job on decluttering! We need to create a 3-station long desk just like yours, with the window in the middle. The desk would be 14 ft wide. What are the dimemsions of your desk, and where did you get all the pieces – the drawers, desktop and cubbies? Thanks.
Sharon says
Our long desk is a built-in unit that was already here when we bought our house. My husband thinks that it was likely custom-built by a carpenter- not purchased as components.