The one craft item that should be in every Mom's “toolbox” is melty beads (also known as Perler beads)! Melty beads crafts are fun to create, and we make new ones every summer as part of our DIY summer camp at home!
! Melty beads crafts are fun to create, and we make new ones every summer as part of our DIY summer camp at home! #SummerCrafts #PerlerBeads #MeltyBeads #SummerFun #SummerCamp")
Getting Started with Melty Beads
! Melty beads crafts are fun to create, and we make new ones every summer as part of our DIY summer camp at home! #SummerCrafts #PerlerBeads #MeltyBeads #SummerFun #SummerCamp")
You can find melty beads at any craft store or buy them here This is an affiliate link: MomOf6 earns a commission if you purchase, at no additional cost to you. .
! Melty beads crafts are fun to create, and we make new ones every summer as part of our DIY summer camp at home! #SummerCrafts #PerlerBeads #MeltyBeads #SummerFun #SummerCamp")
You'll need the plastic trays to hold the beads in place before you melt them. You can use basic square trays This is an affiliate link: MomOf6 earns a commission if you purchase, at no additional cost to you. to create virtually any design, or you can purchase shaped trays This is an affiliate link: MomOf6 earns a commission if you purchase, at no additional cost to you. which make it easier to create specific crafts.
! Melty beads crafts are fun to create, and we make new ones every summer as part of our DIY summer camp at home! #SummerCrafts #PerlerBeads #MeltyBeads #SummerFun #SummerCamp")
You can buy an idea book This is an affiliate link: MomOf6 earns a commission if you purchase, at no additional cost to you. which will get you started on tons of craft layouts that are fun to do, or check out this post over on Craftaholics Anonymous for 36 unique Perler bead crafts!
! Melty beads crafts are fun to create, and we make new ones every summer as part of our DIY summer camp at home! #SummerCrafts #PerlerBeads #MeltyBeads #SummerFun #SummerCamp")
For younger kids, you want to go with larger sized melty beads called Biggie Beads This is an affiliate link: MomOf6 earns a commission if you purchase, at no additional cost to you. . The larger beads are much easier for little hands to work with!
And you'll need trays and designs that work with biggie beads This is an affiliate link: MomOf6 earns a commission if you purchase, at no additional cost to you. .
 Looking for some fun things to do with the kids?
Check out some of our family's favorites! Here's our list of the best backyard games This is an affiliate link: MomOf6 earns a commission if you purchase, at no additional cost to you. and for those rainy days- here are our favorite board games This is an affiliate link: MomOf6 earns a commission if you purchase, at no additional cost to you. !
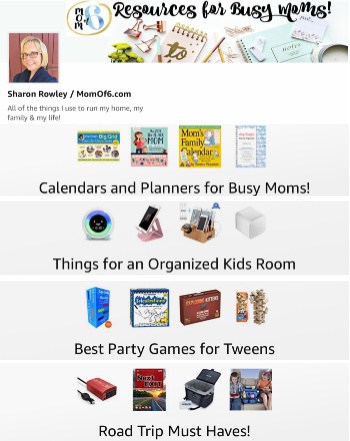
You can find more great resources for busy Moms over on my Amazon influencer page This is an affiliate link: MomOf6 earns a commission if you purchase, at no additional cost to you. !
Tips for Melty Beads Crafts
The fun part of a melty bead project is taking the time to lay out all of the beads on the plastic tray- getting the colors and patterns to be just the way you want!
Then you'll oh-so-carefully take your plastic tray to the counter or board when you intend to iron them.
! Melty beads crafts are fun to create, and we make new ones every summer as part of our DIY summer camp at home! #SummerCrafts #PerlerBeads #MeltyBeads #SummerFun #SummerCamp")
Place a sheet of ironing paper (which comes with the plastic grids) over the beads, and heat them until the beads melt just a bit and join together. For younger children- this is a task best done by Mom!
Pro Tip: After you are done ironing the design, leave the paper on top until the beads have cooled completely. Otherwise, you risk lifting the beads out of position!
! Melty beads crafts are fun to create, and we make new ones every summer as part of our DIY summer camp at home! #SummerCrafts #PerlerBeads #MeltyBeads #SummerFun #SummerCamp")
If you find that your creation is completely fused after the first ironing, place the paper back on top and iron again until you can see the edges of beads coming together.
! Melty beads crafts are fun to create, and we make new ones every summer as part of our DIY summer camp at home! #SummerCrafts #PerlerBeads #MeltyBeads #SummerFun #SummerCamp")
Cute, right?
Please check out my DIY Summer Camp page for lots of ideas on how to host your own kids summer camp at home!
Here are some more great summer ideas for you:
- Free Family Summer Bucket List Printable
- Free Printable Summer Schedule
- 50 Fun Summer Activities, Crafts, and Field Trips (From Pre-K to Teens!)
- DIY Roller Coaster Ride
- Teach Your Kids How to Play Crazy 8's!
How much do you think your kids would love to create some melty beads crafts this summer?

Jennifer says
My kids made a bunch of Christmas ornaments years ago (when they were in 4th and 1st grade) and sold them for 25 cents a piece at a kids craft sale through our homeschool co-op. I don’t know that we really made any profit, but they loved making the different designs leading up to the sale and then selling them to friends. 🙂
Carol says
What is the name of the book with the larger melts beads?